WAGO PFC Tutorial
How to connect WAGO PFC to Stream Software in 4 easy steps?
STEP 1: Setup Azure IoT Hub
- Create IoT Hub
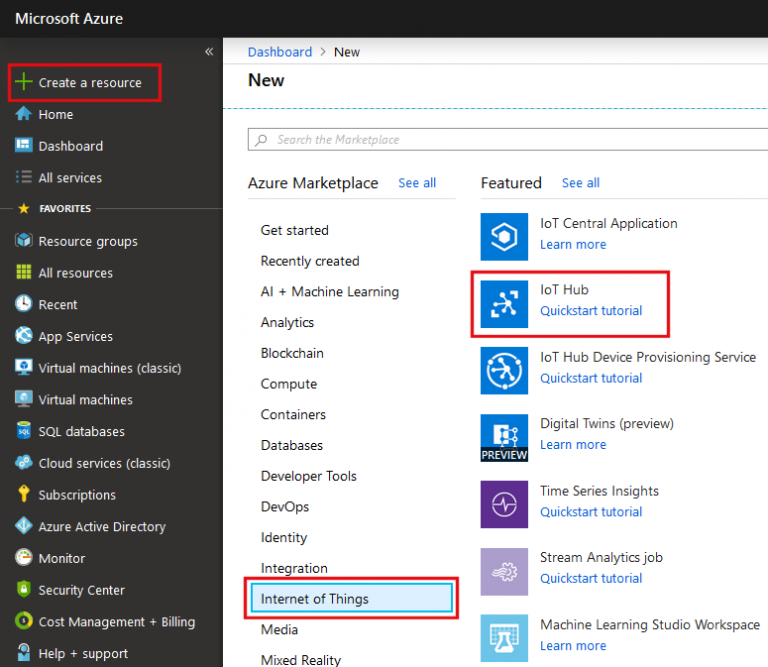
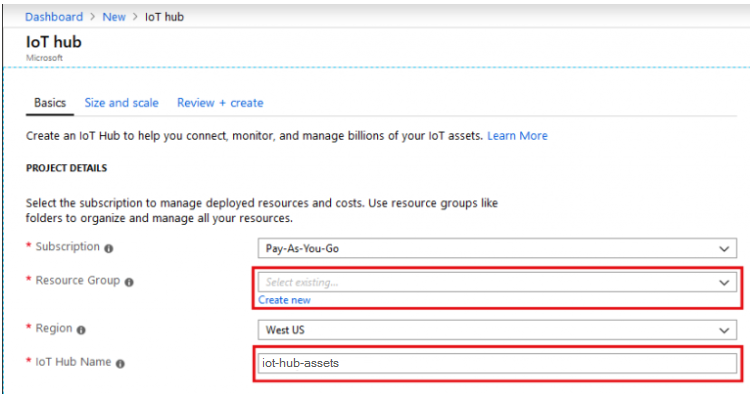
- Enter your IoT Hub name
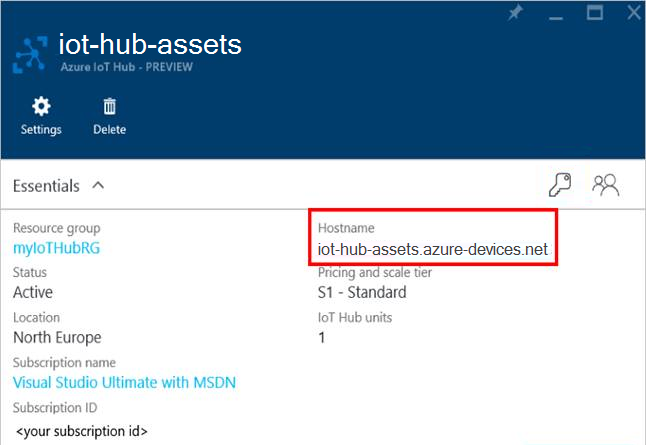
- Take note of the Hostname (we'll use that latter in PFC web portal).
- Take note of the Connection string (we'll use that latter in Stream software configuration).
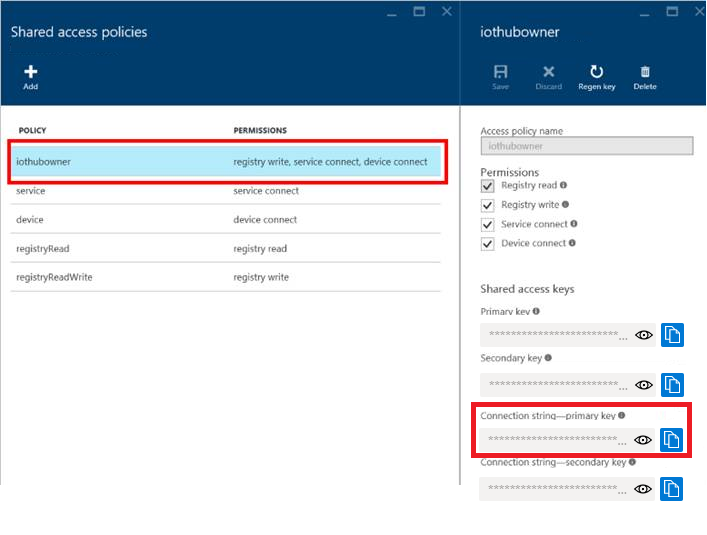
STEP 2: Setup Stream Connection
- From Stream Explorer, create new data source (Azure IoT Hub)
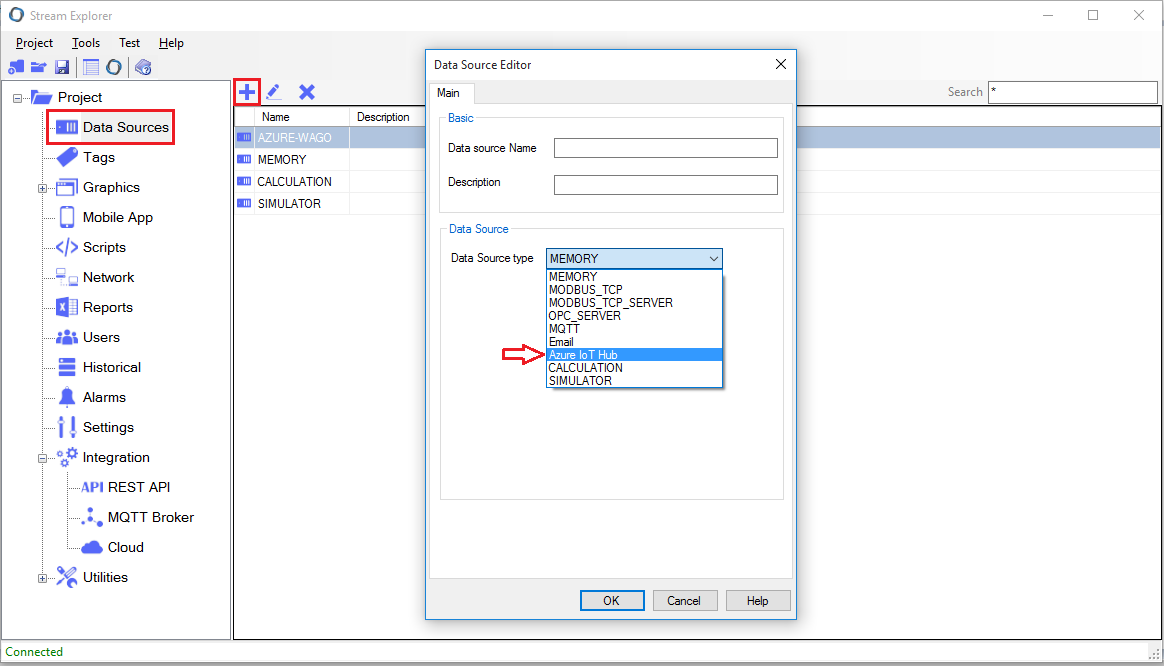
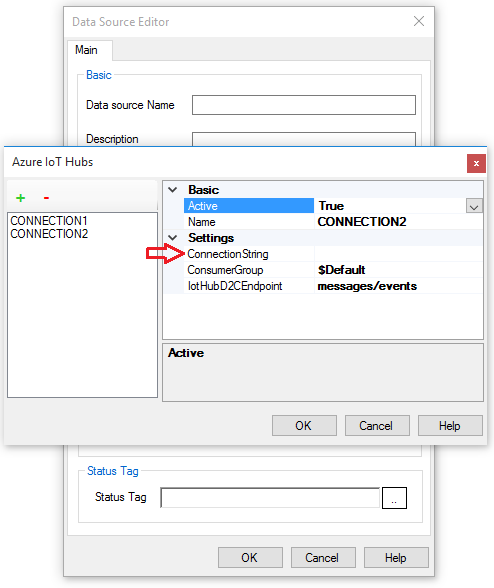
- Click Manage (connections) to create a new connection to Azure IoT Hub
Enter the connection string (taken from Step no.1)
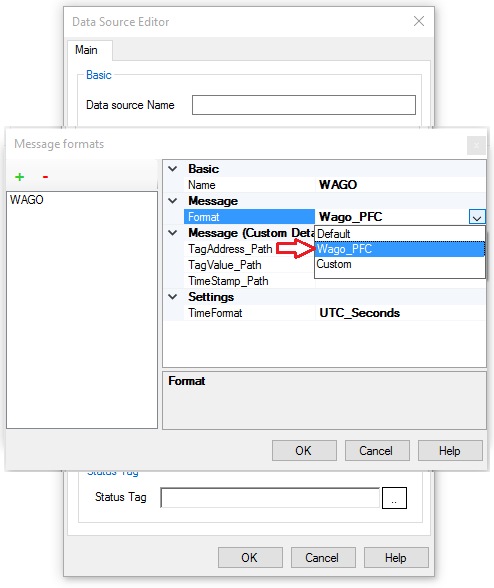
- Click Manage (formats) to create a new connection to Azure IoT Hub
Select Wago_PFC from the formatting options. This allows Stream software to parse the JSON message sent by PFC to the Azure IoT Hub.
STEP 3: Device ID
Each device connected to Azure IoT Hub has a unique ID. You can define it using Azure portal but you can use Stream Explorer as a device management portal to add, check and delete devices.
- To add a new device ID (that will be used for our PFC):
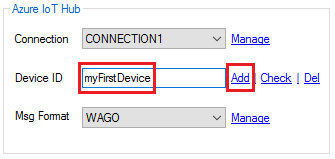
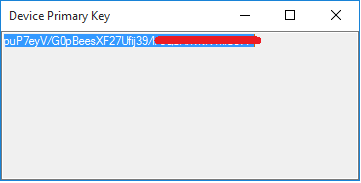
- Click "Add". If successful, a message will appear showing the primary key of the device. Take note of this key as your device will need in order to be able to connect to Azure IoT Hub.
- Open PFC Web Portal, under Cloud Connectivity, enter the required details:
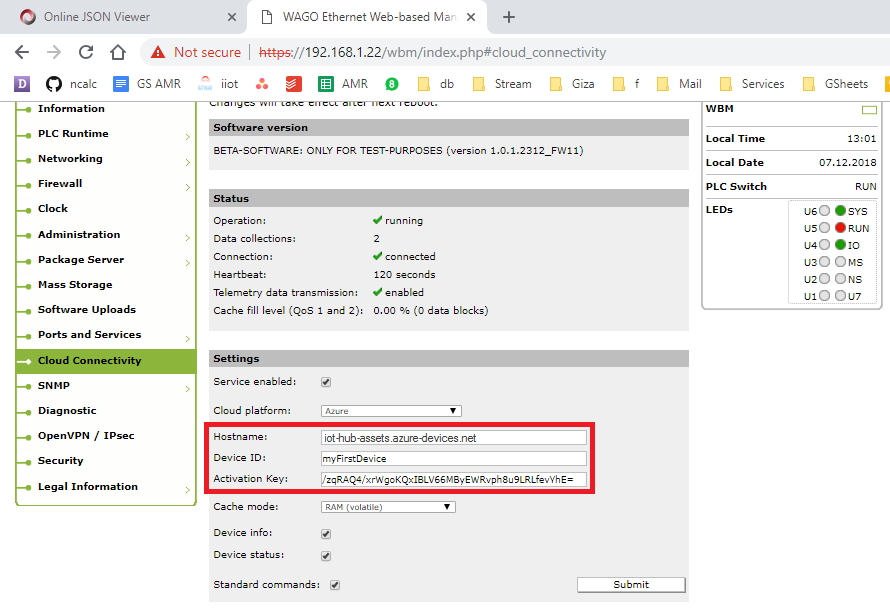
STEP 4: Define Tags
WAGO PFC (Azure IoT Hub) Addressing
The address of any Tag that belongs to a Azure IoT Hub data source (WAGO_PFC format) should should follow the following syntax format:
<Collection ID>;<Tag>
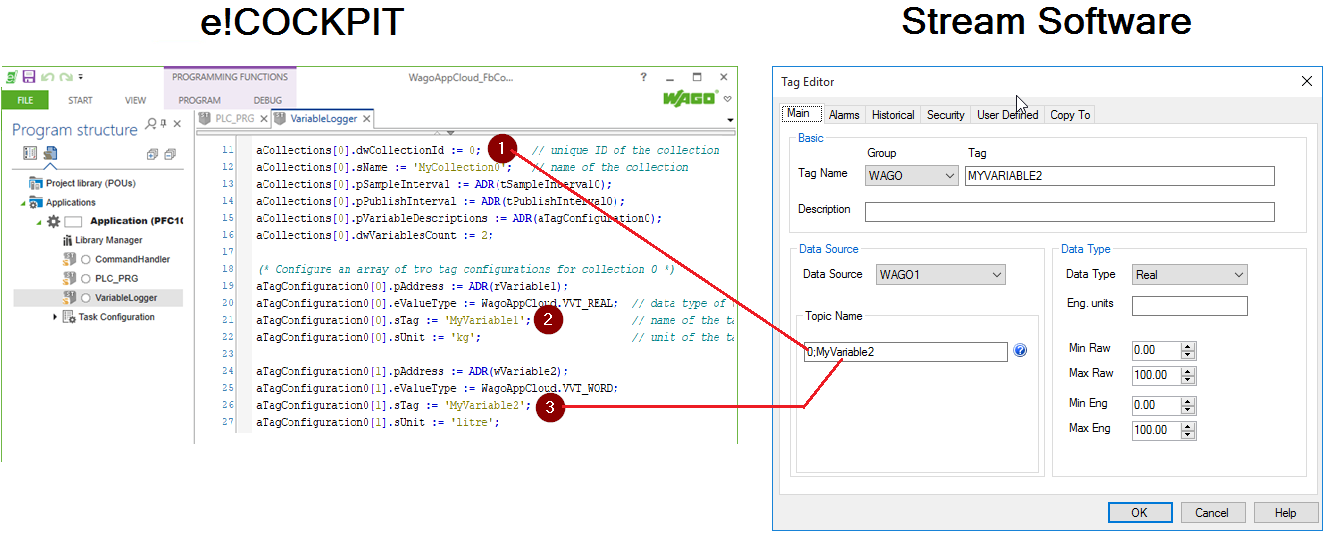
Collection ID and Tag parameters should be predefined in e!Cockpit. Check the following screen shot.
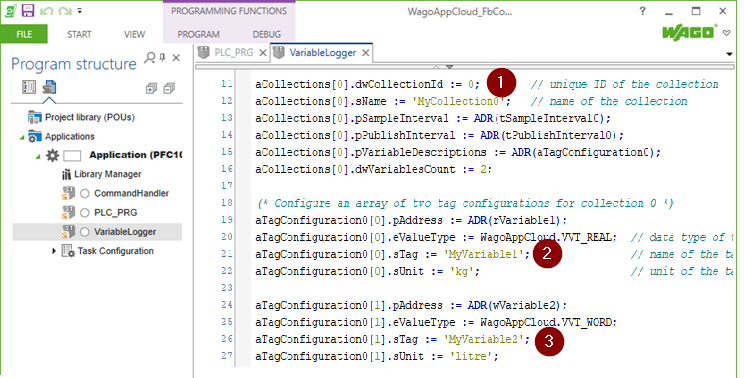
Notice the 3 red circles:
1 Points to the Collection ID.
2 Points to the Tag of the first variable within this collection ID.
3 Points to the Tag of the second variable within this collection ID.
To address these two variables, use the following syntax:
0;MyVariable1
0;MyVariable2
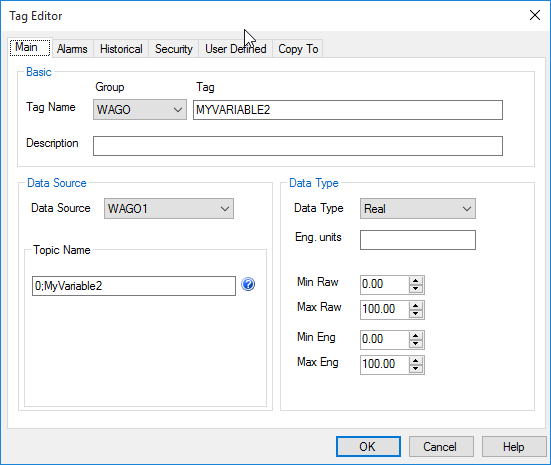
Example screen shot
Collection ID: 0
Tag: MyVariable2
The following picture describes the relation between e!cookpit variables and Stream variables
