Adding New Page
1. Overview
This guide provides comprehensive instructions for adding new pages to your Stream platform dashboard. Whether you're creating a simple monitoring page or a complex control interface, this documentation will walk you through the entire process from start to finish.
Adding new pages to your Stream dashboard allows you to:
- Organize Content: Create dedicated pages for different functions or departments
- Improve Navigation: Structure your dashboard for better user experience
- Enhance Security: Set different access levels for different pages
- Optimize Performance: Load only necessary components per page
- Enable Customization: Create specialized interfaces for specific use cases
2. Step-by-Step Instructions
2.1 Access Add New Page
To begin creating a new page, you need to access the "Add New Page" option from the side menu:
- Log in to Stream Platform: Access your Stream platform using your credentials
- Look for Side Menu: Locate the side navigation menu (usually on the left side of the screen)
- Find "Add New Page": Look for the "Add New Page" option in the side menu
- Click "Add New Page": Click on this option to open the page creation dialog
Prerequisites: Ensure you have the necessary permissions to create new pages. Typically, you need Administrator or Designer access level.
2.2 Create New Page Dialog
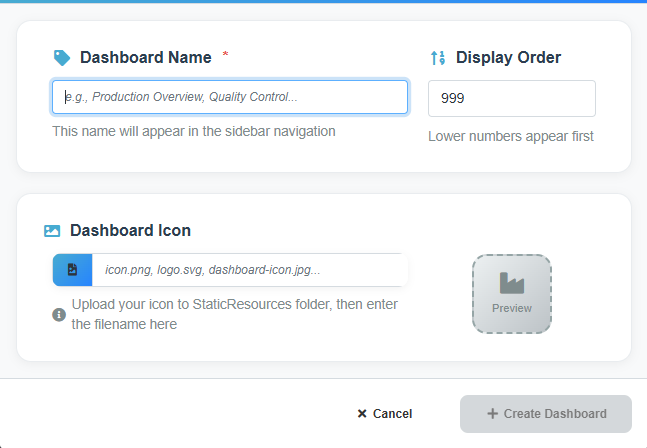
Create New Page dialog showing the page creation form with Dashboard Name, Display Order, and Dashboard Icon fields.
When you click "Add New Page" from the side menu, you'll see the page creation dialog with the following fields:
- Dashboard Name: Enter the name for your new page (required field)
- Display Order: Set the order in which the page appears in navigation
- Dashboard Icon: Upload and configure an icon for the page
- Click "Create Dashboard": Click the "+ Create Dashboard" button to create the page
Important: The Dashboard Name will appear in the sidebar navigation, so choose a clear, descriptive name.
2.3 Configure Page Settings
Configure the essential settings for your new page in the dialog:
|
Setting |
Description |
Required |
Example Value |
Notes |
|
Dashboard Name |
Name that appears in the sidebar navigation |
Yes |
Production Overview |
User-friendly display name |
|
Display Order |
Order in which the page appears in navigation (lower numbers appear first) |
No |
999 |
Default is 999, adjust as needed |
|
Dashboard Icon |
Icon file to display in the navigation menu |
No |
icon.png, logo.svg |
Upload to StaticResources folder first |
Dashboard Name: This name will appear in the sidebar navigation, so choose a clear, descriptive name that users will easily recognize.
Display Order: Lower numbers appear first in the navigation menu. Use this to control the order of your pages.
Dashboard Icon: Upload your icon file to the StaticResources folder first, then enter the filename in the icon field. The preview will show how it will look.